
Drones are supposed to be fun for everyone - whether you’re a beginner or a professional. But when the drone is so complicated, you practically have to build it after you buy it, that’s not any fun.
Thankfully, there’s a drone that’s not only long lasting and fun, but it’s a simple set up so you get out of the house and on your way to flying fun super fast. The QCopter Quadcopter Drone has a ton of great features.
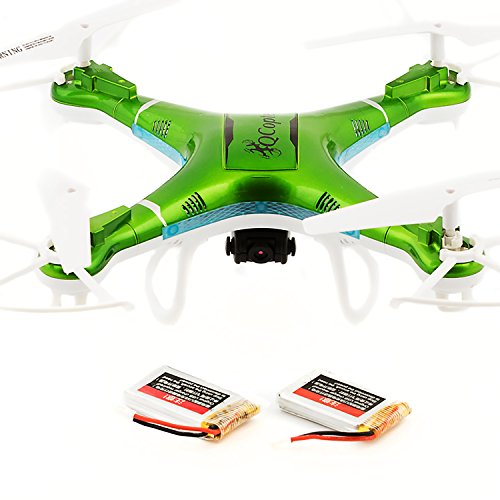
The package includes the drone, the camera, the controller, an instructional manual, landing gear, the USB drive, and an SD micro card. It also includes a second battery for your use.
When you take the drone out of the box, the first thing you want to do is put the brackets on the device. The next step is to put the camera onto the drone body. This is a simple step.
All you have to do is plug the drone camera in and the clips will hold it steady in place. Plug in the battery next. You’ll get two of them in the box. This battery has 23.7 volts, which means you get from twice to three times as long in your flight time than regular drone batteries.
When you’re charging the battery, the red light indicates the charging mode. Once the light is off the charger, it means the battery is ready to use. The drone comes with propeller guards.
Some users make the mistake of not installing these and prefer to use the drone without this added layer of protection. That’s a mistake because these guards are your line of defense in keeping the blades from getting damaged.
They’re easy to install. All you have to do is screw that center screw in place. Then you’re ready to switch on the drone. That on button is located beside the camera. After that, put the SD card in and then sync the controller to the drone.
On the switch left of the power switch on the transmitter, you can switch on the camera or keep it down if you want to use the video option. The transmitter does have a headless mode feature and when it’s on, lights on the drone will alert you to this fact.
Here's Some Drones With Camera and Gps:
UDI RC U845 WiFi 2.4GHz 6 Axis Gyro FPV Drone with HD Camera RTF Quadcopter Bundle with BatteryWingsland Minivet V2 with 5UPair One Drone with Camera Gimbal Live Video 2.7K HD 7 inch FPV Monitor Screen GPS Quadcopter, Auto Return to Home Function, Aerial Photography Beginner DroneDeeXop-Babrit FPV Wifi RC Quadcopter Remote Control Drone with HD 720P Camera RC Drone
 Wingsland Minivet V2 with 5
 UPair One Drone with Camera Gimbal Live Video 2.7K HD 7 inch FPV Monitor Screen GPS Quadcopter, Auto Return to Home Function, Aerial Photography Beginner Drone
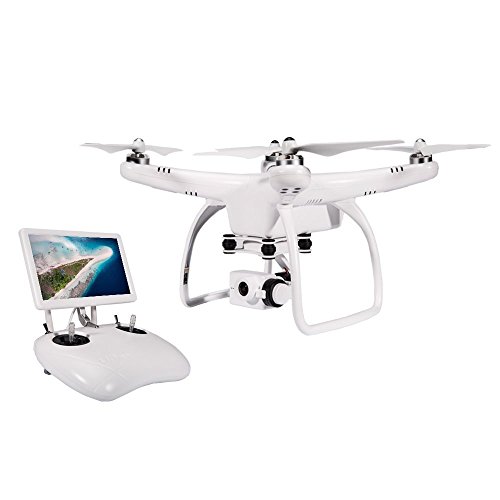 DeeXop-Babrit FPV Wifi RC Quadcopter Remote Control Drone with HD 720P Camera RC Drone
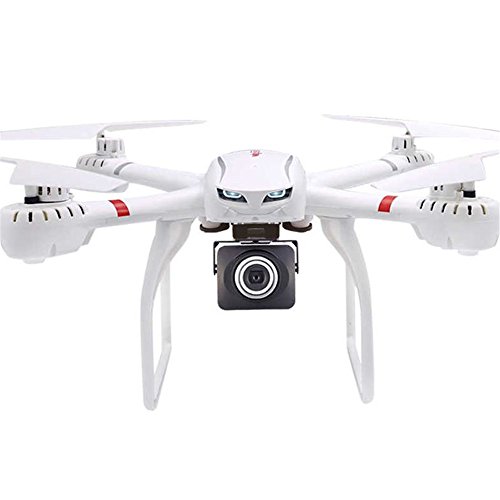
The drone does have the handy go-home feature, which is useful in bringing the drone back to you. However, it doesn’t have a GPS ability. The joysticks on the transmitter are how you can determine whether the drone is raising up or lowering.
If you want it to rise, you simply push the throttle up and do the opposite if you want the drone to lower. On the left side of the switch that operates the camera is the speed control.
This is what you want to use if you’re outside and the weather kicks up a bit of wind. This feature is what will infuse the drone with the power it needs to combat that wind. There is also a low mode in case you want to fly the drone inside your home. The drone is a 6 axis for great stability and has LED lights for night flying.
No comments:
Post a Comment